Tracking Work Hours
Qbserve tracks project time automatically instead of using a timer, which requires you to start and stop it.
Setup automatic work tracking
Qbserve achieves automatic project tracking by watching opened URLs, document paths, window titles, and chat names. To track time spent on projects, start with creating a project in the Advanced tab and then switch to the Rules section. Usually, you are going to need only two to three rules for a single project; for example:
- Full client or project name which can be found in different titles (like Trello board window title or Slack team name)
- Slight variations of this name (like with an underscore or without the space symbol) that you use for your project folder or can find in URLs related to this project
If there are some "common" websites or apps that don't have unique identifiable keywords, you can simply categorize them in bulk at the end of the day inside the Timesheet tab. It still takes some time but removes the hassle of starting/stopping timers (as required by many other apps for logging work hours).

Analyze time spent on projects
The best approach to managing project time with Qbserve is to check the Timeline and Projects sections in the Timesheet at the end of each day, while you still remember what you have been working on. The Timeline shows project-colored markers both in the chart and the table, so you can easily find and adjust gaps in the logged project time. It's also possible to manually add time that you spent away from your Mac.

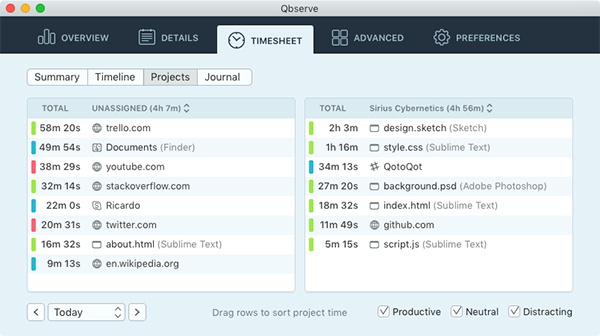
In the Projects section you can switch tables between different projects by clicking on the headers. Check the unassigned list to see if Qbserve missed any project-related activities and drag them to the required project column. You can select multiple activities by holding the "command" (⌘) key. Also look for any common traits between these activities — maybe it's possible to create a rule to save you from manual assigning in the future.

The Projects section always shows windows as activities instead of hiding them inside apps because it's rare to use some work-related app for only one project. When you drag an activity, you assign or unassign all of its duration for a single day. In case you happened to have an activity that needs to be assigned to multiple projects, use the Timeline section for chronological assignment.
Create invoices
Please check this guide to invoice generation.
